Search the Community
Showing results for tags 'instance'.
Found 2 results
-
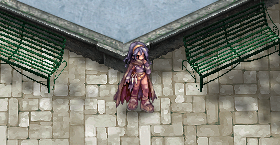
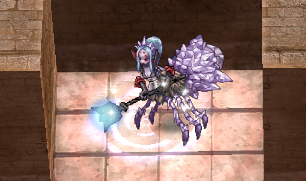
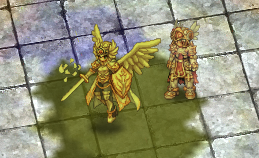
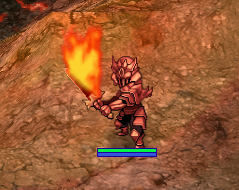
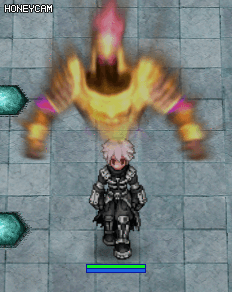
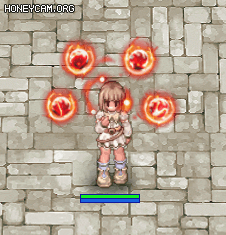
"What is dead should remain, as if it doesn't, the balance of the world is disrupted." Greeting Midgardians, as we have progressed through the days and months in RevivalRO after the appearance of Vanna, there has been a shift in the balance of life and equity. Vanna had brought the Undead King back to life thus creating an imbalanced world. Draphael, the final villain to destory, has open a dimensional rift between Midgard and the Underworld and thus... a gloomy castle rose from the dimensional rift. Many scouts were assigned to infiltrate the castle to identify any information of whom the castle may belong to, however... none came back alive. Soon after, Undead Soldiers began to attack innocent towns and villages, all the while burning them down to the ground to nothingness. But we must have faith as the injured Queen has decided to gather adventurers to defend Midgard from the dead! Previously on Vanna's Story... Adventurers were gathered to defeat the Undead King; in a sense, to bring peace to Midgard. However, once he was defeated, the Queen, Catherine D. Geoborg, investigated Niflheim to learn that the Undead King was brought into our world by a terrible existence that was able to control it... It is the witch named... Vanna, in legends, she was known to be the servant of Jormungandr, the World Serpent. After the investigation, the Queen was attacked by a mysterious fog and only one survivor from the expedition was able to return in one piece... the rest, were either lost or held hostage within Nilfheim. Soon after, the adventurers went out on a rescue mission to save the queen! However, who knew what destruction this had brought in the end... This instance will be here from August 9th to September 13th, 2020 @ 23:59 ! World Without Balance Welcome to the World without Balance Event! To start this quest, you must talk to Recruiter Naomi [Located in prt_gld 168, 108] who will require you to be in a party of six with the level requirement of 255 for all. Once you have gathered your team, you may talk to Recruiter Naomi to start the instance that happens across three maps. The first map will involve Varunastra who guards the entrance of the Undead King's Castle; to gain access, you must defeat all the Undead Scouts as well as Varunastra to venture further... In the second map, you and your team must venture into four different entrances that will lead you to four different Elemental Guardians to destroy... but do venture carefully as what meets the eye may be deceiving... Once all the Elemental Guardians have been defeated, the Deity of Balance will appear to converse with you all before it decides to destroy you all. You must defeat the Deity of Balance in order to enter the Final Map. In the final map, you and your team will face off against Draphael, who is both human and angel as the Messenger of Ruler of the Underworld. Once you have defeated Draphael, you shall be rewarded, but be warned, this is no easy task. Cooldown for Instance: 24 hrs Fight Mechanics: Draphael (Human Form) switches between 10% Physical and Magical Reflect status every 20 seconds (Indicated by Blue/Green Aura) Draphael (Angel Form) is different than Draphael (Human Form), Draphael (Angel Form) spawns a Totem every 2 minutes, Totem grants Draphael 100% Reflect for Physical and Magical Attack. Title Rewards: As what comes with instances... also come new titles to obtain! Here are the two new titles that you may claim! Title: Wombat Warrior Requirement: Complete World Without Balance on Normal Mode 30 times. Title: Balance Master Requirement: Complete World Without Balance on Nightmare Mode 10 times. Here are the rewards possible to gain once you have finished the instance successfully! Additionally, we have decided to add in a shop where you will be able to purchase some of these items with a Token of Balance! There will be two different shops, one for Normal and Nightmare Mode, which means there will be different pricing for each! Note: You cannot purchase items with Normal Mode Tokens in the Nightmare Shop, and vice versa. While Normal mode will be the typical price, Nightmare Mode will have almost half off prices for the items! But be sure to spend wisely on what you want! [1 Nightmare Mode Token = 2 Normal Mode Token] Seven Sins [2] Takenaga's Jitte [2] Loony and the Beast [2] Primordial Armor [1] Primordial Garment [1] Primordial Shoes [1] Archaic Armor [1] Vintage Shoes [1] Prehistoric Shield [1] Ancient Ring [1] Ancient Pendant [1] Netherworld's Gift [0] Orb of Balance [0] Costume: Spirit of Guardian Token of Balance Token of Balance is a token given for completion of instance.


-
========== World Without Balance ... and you ========== World Without Balance is the newest event instance in RevivalRO and features two modes you can run it in: Normal and Nightmare mode. The major difference with that be, the monsters stats are increased in Nightmare Mode, as well as their HP. Big Note: This "guide" is written after my experience of Nightmare runs in the instance, but since basically only the stats of monsters are different between both modes, I assume it can apply to Normal as well. ========== The Party ========== A "new" unique feature of the Event is the limited party size of 6 people, you cannot run the instance with more or less people. This means your choice of characters need to be efficient. There couple of team compositions out there that can work, it all depends on how good the player can play their classes and what gives the best damage output. A few examples of party constellations are: - Sniper / Sniper / Professor / Gypsy / Whitesmith / High Priest - Sniper / Professor / Professor / Soul Linker / Gypsy / High Priest - Assassin Cross / Sniper / Professor / Soul Linker / Creator / High Priest Killers: As in basically every content, Sniper is without a doubt the best killer. The Range advantage is just too good. Further, they cover up very well with Elemental Arrows. Premium items are allowed, so Premium LKC can boost their damage even further. Assassin Cross can do a good job too, but they have the disadvantage of getting close to the enemy and potentially eat a lot reflect damage. Tanker: Another basic choice, Professor excel in tanking yet again. Commonly with either 100% Neutral/ High MDEF, High DEF or simply PD while standing on Land Protector. But basically, any class can tank in the instance with the right gears. Support Classes: The "decoration" aka support line up boils down to basically what is the main damage. Gypsy gives a high CRIT boost with Fortune's Kiss. Whitesmith gives ATK boosts with their Buffs. High Priests are High Priests. Soul Linker are mostly useful with Instant Kaizel: When you are affected by Hell's Power you will be resurrected regardless (but you need to make sure you have always Kaizel to keep it like that), Kaupe and Kaahi. ========== Gear Examples ========== Killer: As example here, Sniper. Basically your default Crit Cedi Sniper can shine here easily. Thanks to Aka for providing the screenshot. Most Noteable skills: ... the 3 Sniper always uses. Honorable Mentions with gears: Hyzolist Hat, Gold Snapback Hat, any other headgear that increases damage depending on the enemies element. LKC if you got it. Reset Girl Robe, Fire Armor (if a Vulcano is provided). Any specific gears for the elements the monsters have (can be looked up in the Wiki). At least 240 CRIT will be needed, as well as high HIT. In short, anyone who used his Sniper in PVM longer then 5min should be able to know what he needs to kill things quick. Tanker: (Personally I didn't played tank in there yet) Most Noteable skills: Land Protector (if support Vulcano), Dispell, Magic Rod Basic Professor tanking gears, mostly same as in Cedi. If you got the gears, you can try go 100% Neutral Resistance with some high MDEF (Stuff such as Deviling Card, Gibbet Card, Antiqu Helm, Little Devil Wings, Hauberk, Ebonies, Winged Cardigan). Alternativly PD can be tried, which had the downside tho, that you need to be on a Land Protector, and be more weak to magical attacks. Tanks should be played by players who have at least some knwledge of the game, and know what they are doing, since they are core part of the reason a party doesn't get rekt instantly. Keep a good stock of Yggdrasil Berries, since the instance doesn't has access to @storage. Another Tanker option can be a 90 DEF/MDEF Steel Body Champion. ========== The Instance ========== Time Limit: 60min (Both Modes) Party Size: 6 Cool Down Time: 24h (counting from when you enter) Re-entries: 1 (Nightmare); 3 (Normal) Note: For Support classes it's beneficial to stay "out of sight" of boss monsters, since they tend to cast nasty AOE magic/Earthquake/or De-Buffs. Killers sadly don't have so much luck since they need to stay in sight to attack the monsters. Always make sure you are outside of the Red area marked by the game! The instance has 3 different sections/maps. Each ending with a main MVP boss you need to kill. 1. Section: Varunastra When you spawn in the first section, the objective is simple: kill all monsters in sight. It is fairly easy, since they are all Undead (a ME Priest can come handy in dishing out additional damage). Take care tho, they like to spam Sacrifice. After all Undead Scouts died, Varunastra spawns on top of the staircase. Her Storm Gust can hurt, but usually Killers and Support row should be save from most damage. When she is killed, the party can move to the next area. 2. Section: Deity of Balance The second section is split into basically 5 sub areas, the 4 Elemental Guardians and the boss. On the map you will see 4 markers, telling you the entrance to each Guardian room, you can finish them in any order. The 4 guardians have each a different element, Wind, Water, Earth and Fire. As well as unique magical skills such as Jack Frost or Chain Lightning. They are the only monster in their specific area, so it's not difficult to take them down. Once all 4 Guardians are defeated, the Deity of Balance will spawn in the middle of the map. Same drill as always, take it down to proceed. Tho, in between his death and respawn, he will ask the party to solve his "riddles" (he will ask questions that can either be answered with balance or imbalance, demanding the players to either split in groups of either even or uneven numbers left and right of him). Note: you technically do not need to play this with the Deity, and just wait till he is done, since he will fight you regardless if you solve his riddles right or wrong. After the Deity died 3 times, you can proceed to the final room. 3. Section: Raphael In the last room Raphael in his human form will wait for you. His unique fighting mechanic consists of a changing aura, when his aura changes to Green, he will Reflect 10% of all physical and magical damage (this also includes Ranged damage). To fight against this, you can either stop between his aura changes, or just brute force it (for example Kaizel Spam the Killer). After you defeated him once, the party needs to either seek shelter on randomly placed Saftey Walls on the map to not get killed, or you just wait it out (if you got Kaizel). Human Raphael will spawn again. Same fight as before. Once his human form is defeated, walk to the top of the map, Raphael in his Angel form will wait for you there. Again, take him down. Angels unique gimmick is, that every 2 minutes he spawns a "Totem" (a hand shaped monster) randomly on the map (it will have a marker). While this Totem is active, he will reflect all damage to 100%, physical (also ranged) and magical. Taking the Totem down is easy, it always takes 1 damage, but doesn't fight back. Again, after he died the first time, the map will get nuked (the game with the Safety Walls, same applies here too), and he will spawn again. Same fight as the first time. The instance is finished when Angel Raphael is defeated. ========== Other Notes ========== Hell's Power is a de-buff which makes it impossible to resurrect the one affected by it (because of that Kaizel can be a very handy buff in the instance, due to the nature of it instantly resurrecting the player, it "ignores" the Hell's Power status). Details for the monsters in the instance can be found in the Wiki (https://wiki.ragnarevival.com/wiki/World_Without_Balance), the page also features a video (which is a very subparb run of the instance tho). Freeze immunity can be handy for support classes, as well as basic Status Immunity like Silence.